In the last of our instructional blog posts, Sending a message – the simple, the useful and the clever part 2, we took you through some of the nifty little Messagebox features, designed to help you get your SMS marketing campaigns off to a flying start.
In our next couple of installments we will guide you through using some of the more advanced, yet easy to use special features that we are sure you are going to love.
So, if you are ready.
Listening at the back?
Then let’s begin…
Set your Sender ID
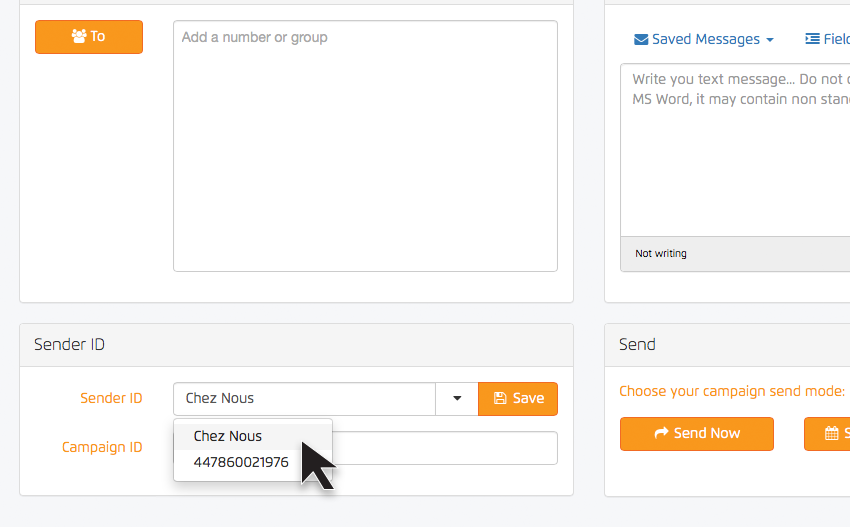
So we start off with a nice easy one, one which you may have already had contact with, but for those not so quick off the mark, here is the Sender ID field.
This is where you are able to show your customers who is sending the message, for example John, Paul, George or Ringo (there’s a band in there somewhere)
Your brand or business name will work well here with a generous 11 characters to play with.
You can set it as your dedicated ‘07’ txtus number or our 88802 short code number.
To use the sender ID function enter your desired name, word or brand and click save. This will also store the entered word into a list of sender ID’s which you can use in future campaigns.
Create sub accounts/split the credits
This feature sets us apart here at Text Marketer – our fantastic sub account system. From one main master account you can manage a whole host of sub accounts, transferring credits between them with ease and full reporting available.
We have found that this feature is great if you are working as a franchise of a bigger brand, host a chain of stores, offices or have various different departments which will boast varied uses for the SMS platform.
To activate this option simply contact our dedicated support team by email or telephone and we will activate it for you right there and then.
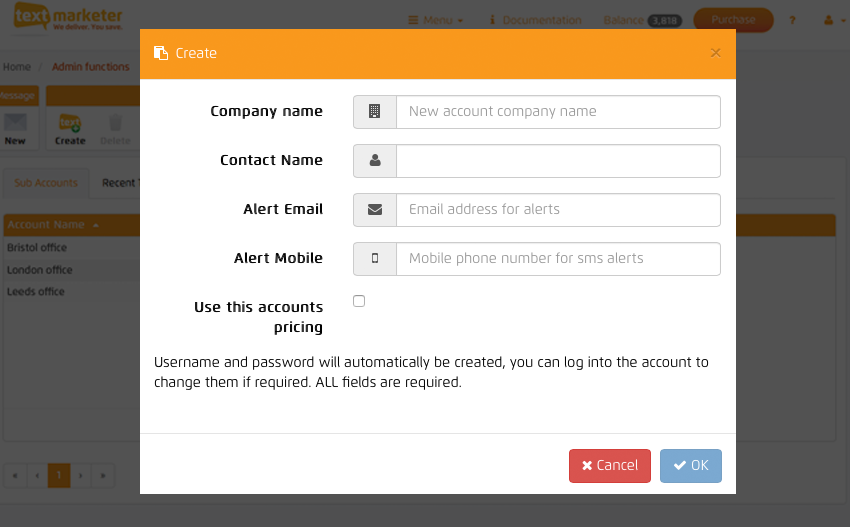
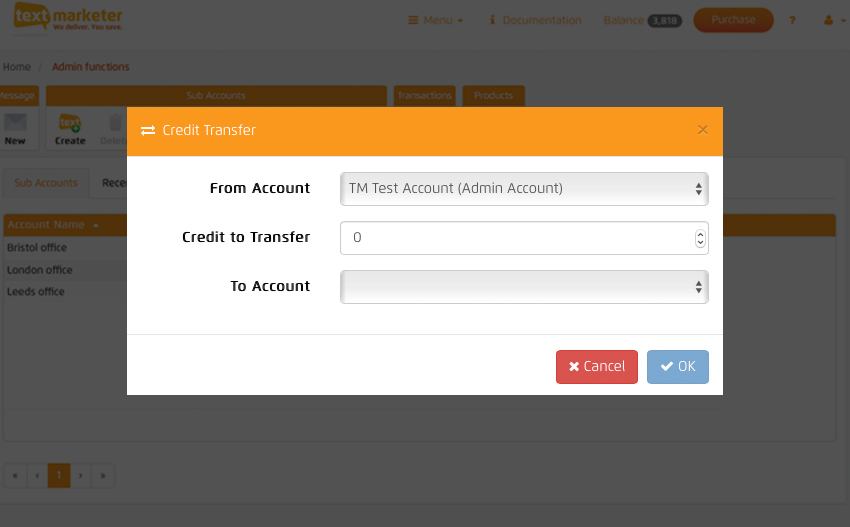
Under the Admin Functions section, in the top toolbar you will see the buttons ‘Create’ and ‘Credit transfer’
Create your sub account, and then to transfer credits all you have to do is click the credit transfer button, and from there select the number of credits and which accounts you want to transfer from and to.
As the Admin of the Messagebox account you can control and view all sub-accounts created – those users given access to a sub-account will only be able to view and access that one.
Copy & paste contacts into a group in Manage Contacts
This is a smart but simple feature that even technophobes love… You know the humble ‘copy and paste’ feature? Well it works here too.
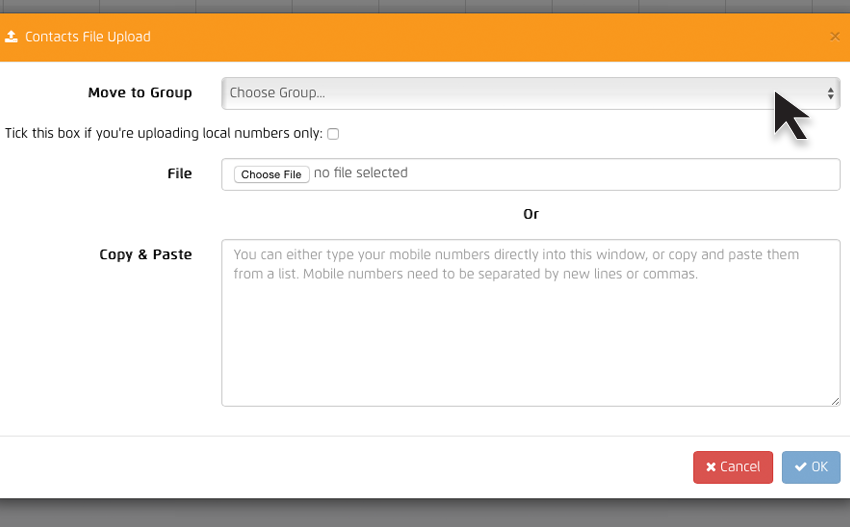
Clicking the import button in the toolbar will result in a small pop-up window appearing (see below). From here, copy your list of numbers and paste them into the box provided, making sure the numbers are on separate lines or separated by a comma so our system can determine where one phone number ends and a new one begins.
Select which contact group you want them to be added to and click ‘ok’.
Custom data fields in manage contacts
In the contact area of our system you are given several data fields; name, company, location etc. However, here there are also numerous custom data fields which offer the ability to enter more advanced information about your customers.
The more relevant your message is the more responses you will receive, so this little feature can be incredibly useful and powerful for you to group your demographics by particular segments.
Here, you have the option to either upload a file with data already in place and arrange your columns headers to suit, or manually add the info to each by clicking on the contact and editing in the toolbar.
You can then arrange the order of your contacts by clicking the dropdown and selecting ‘sort by’ -ascending or descending.
Simple, smart and fast summarises our Messagebox features. These features have helped deliver billions of messages and saved thousands of our customers both time and money with SMS marketing.
Our next installment will focus on further features in Text Marketer’s toolbox, keep your eyes peeled.


